
Delavnica 2.del - Workshop part 2
Kot vedno sem se najprej lotil detajliranja v sprednjem kolesnem prostoru- pravzaprav bi moral reči prostor za shranjevanje sprednje pristajalne noge. Vse stare dele sem odstranil:
As always, I started with the detailing of the front undercarriage bay or, more accurately, the bay for storing the front undercarriage leg. I removed all of the old parts:


Kot že rečeno, bo to letalo za navpično vzlet in pristanek in torej ne potrebuje koles. Zaradi X-Wing-ov morajo biti pristajalne noge višje in teleskopske. Razen luči je stara sprednja pristajalna noga od F-14 neuporabna, zato sem vse moral narediti v samogradnji. Uporabil sem tudi 2 Eduardova jedkana dela za F-14.
As already mentioned, this aircraft will have vertical take-off and landing, and therefore doesn’t need any wheels. Because of the X-Wings, the undercarriage legs must be higher and telescopic. Except for the light, the old front undercarriage leg from the F-14 was useless, so I had to build everything from scratch. I also used 2 Eduard F-14 etched parts.

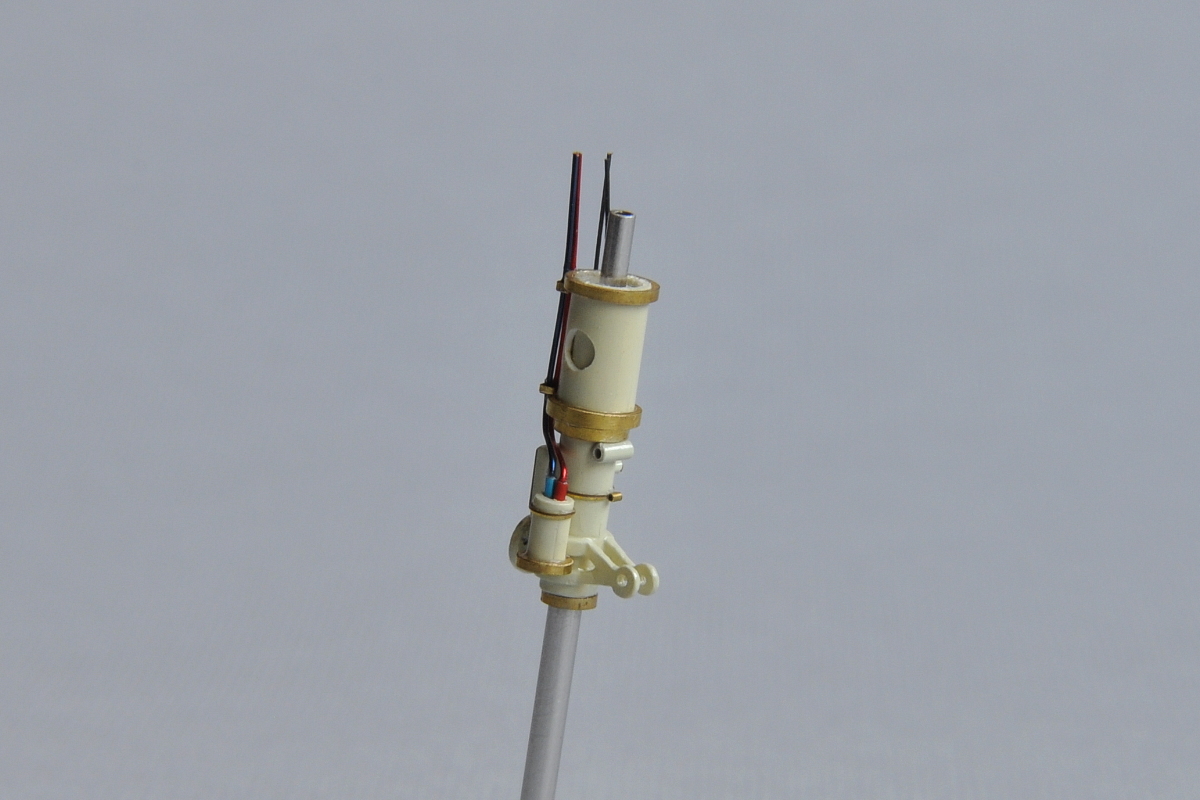
Takole izgleda skoraj gotova sprednja pristajalna noga:
This is how the nearly finished front undercarriage leg looks like now:


Za izdelavo loput za zapiranje kolesnega prostora sem uporabil Eduardove jedkane dele, notranjo stran loput pa sem naredil iz stirena.
To make the hatches closing the undercarriage bay, I used Eduard etched parts, and the inside of the hatches is made from styrene.


Sledila je izdelava kabine. Ker sem nabavil Eduardove jedkane dele za kabino sem jih skoraj vse tudi uporabil. Kolikor se je dalo sem se potrudil, da bi kabina bila v stilu steampunka. Najprej sem pobrusil in počistil obstoječi kabinski prostor.
Then I started working on the cockpit. As I had bought Eduard cockpit etched parts, I used most of them. I tried to recreate the Steampunk cockpit as much as possible. First I polished and cleaned the existing cockpit.

Zaradi brušenja nekatere površine niso bile več ravne zato sem naredil nove iz stirena 0,3 mm. Vse skupaj sem prekril z bakreno folijo, ki sem jo kasneje prelakiral z modrim prozornim lakom.
As certain surfaces were uneven because of the polishing, I made new ones using a 0.3 mm styrene. I covered the entire surface with copper foil, which I then coated with a transparent blue varnish.


Tudi podlagi za sprednji instrumentni plošči sem naredil iz stirena, za izdelavo nekaterih drugih detajlov pa sem uporabil Albionove proizvode.
The bases for the front instrument panels are also made from styrene. For other details, I used Albion products.

Eduardove instrumentne plošče sem prebarval z oranžnim prozornim lakom. Takole izgleda skoraj gotova kabina:
I painted the Eduard instrument panels with a transparent orange varnish. This is how the nearly finished cockpit looks like now:


